Fichiers statiques
Les vues authentification et templates fonctionnent, mais elles sont très basiques à ce stade. Il est possible d’y ajouter du CSS de façon à améliorer la mise en forme de vos pages HTML. Comme ce style ne changera pas, il sera stocké comme un fichier statique plutôt qu’en utilisant un template.
Flask ajoute automatiquement une vue static``qui prend un chemin relatif au répertoire ``flaskr/static et sert les fichiers qui s’y trouvent. Le template base.html contient déjà un lien vers le fichier style.css:
{{ url_for('static', filename='style.css') }}
Outre le CSS, les autres types de fichiers statiques pourraient être les fichiers contenant des fonctions JavaScript ou des images et logos. Ils sont tous placés dans le répertoire flaskr/static et référéncés en utilisant url_for('static', filename='...').
Ce tutoriel n’a pas comme objectif de vous apprendre à écrire du CSS, copiez simplement le fichier ci-dessous dans flaskr/static/style.css:
flaskr/static/style.css¶html { font-family: sans-serif; background: #eee; padding: 1rem; }
body { max-width: 960px; margin: 0 auto; background: white; }
h1 { font-family: serif; color: #377ba8; margin: 1rem 0; }
a { color: #377ba8; }
hr { border: none; border-top: 1px solid lightgray; }
nav { background: lightgray; display: flex; align-items: center; padding: 0 0.5rem; }
nav h1 { flex: auto; margin: 0; }
nav h1 a { text-decoration: none; padding: 0.25rem 0.5rem; }
nav ul { display: flex; list-style: none; margin: 0; padding: 0; }
nav ul li a, nav ul li span, header .action { display: block; padding: 0.5rem; }
.content { padding: 0 1rem 1rem; }
.content > header { border-bottom: 1px solid lightgray; display: flex; align-items: flex-end; }
.content > header h1 { flex: auto; margin: 1rem 0 0.25rem 0; }
.flash { margin: 1em 0; padding: 1em; background: #cae6f6; border: 1px solid #377ba8; }
.post > header { display: flex; align-items: flex-end; font-size: 0.85em; }
.post > header > div:first-of-type { flex: auto; }
.post > header h1 { font-size: 1.5em; margin-bottom: 0; }
.post .about { color: slategray; font-style: italic; }
.post .body { white-space: pre-line; }
.content:last-child { margin-bottom: 0; }
.content form { margin: 1em 0; display: flex; flex-direction: column; }
.content label { font-weight: bold; margin-bottom: 0.5em; }
.content input, .content textarea { margin-bottom: 1em; }
.content textarea { min-height: 12em; resize: vertical; }
input.danger { color: #cc2f2e; }
input[type=submit] { align-self: start; min-width: 10em; }
Vous pouvez trouver une version moins compacte de style.css dans le fichier example code.
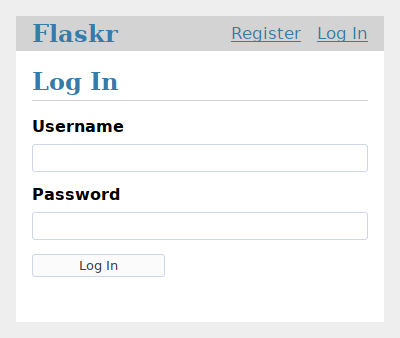
Si vous allez sur http://127.0.0.1:5000/auth/login, la page devrait ressembler à la capture d’écran ci-dessous.
Vous trouverez plus d’informations sur CSS dans Mozilla’s documentation. Si vous changez un fichier statique, rafraîchissez la page de votre navigateur. Si le changement n’a pas d’effet, essayer de vider la cache de votre navigateur.
Continuez en lisant le document Le plan du blog.